Laptop Over Heating Fix

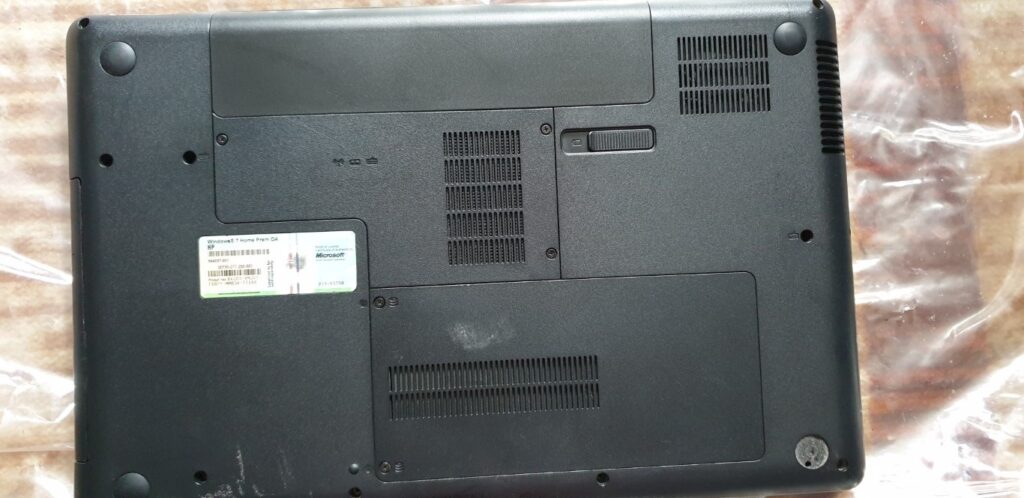
I have an HP G62 SA laptop with Core-i3 330M which I purchased in 2010. Recently, it started powering off after using for a few minutes. I suspected heat-sink compound issue. Either the heat-sink compound has dried-up and as a result not letting the heat-sink make a contact with the processor surface. So I decided to open it up and investigate, like so:

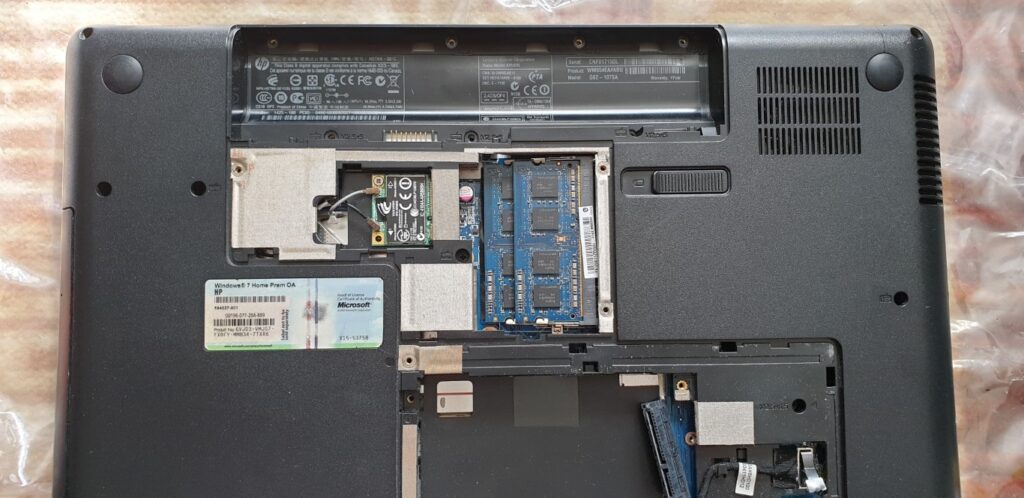
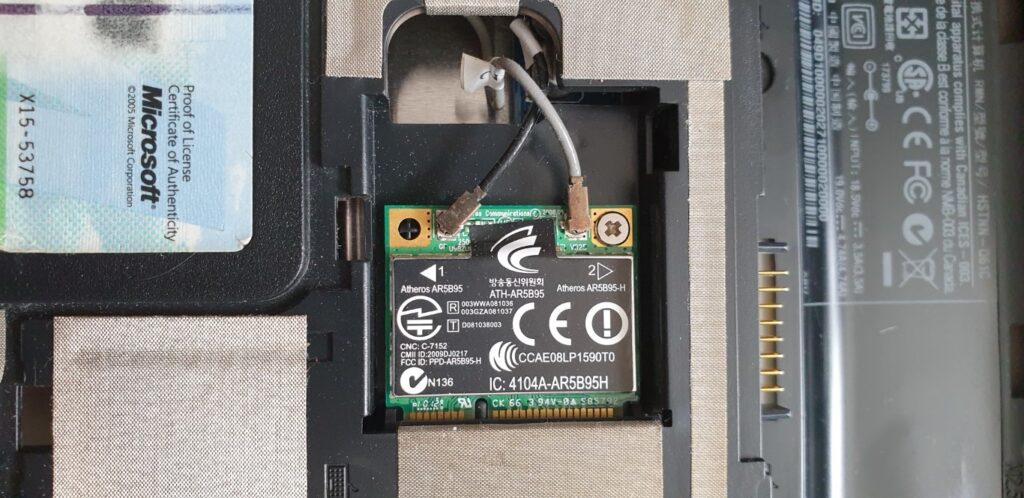
Now disconnect the Wifi module:

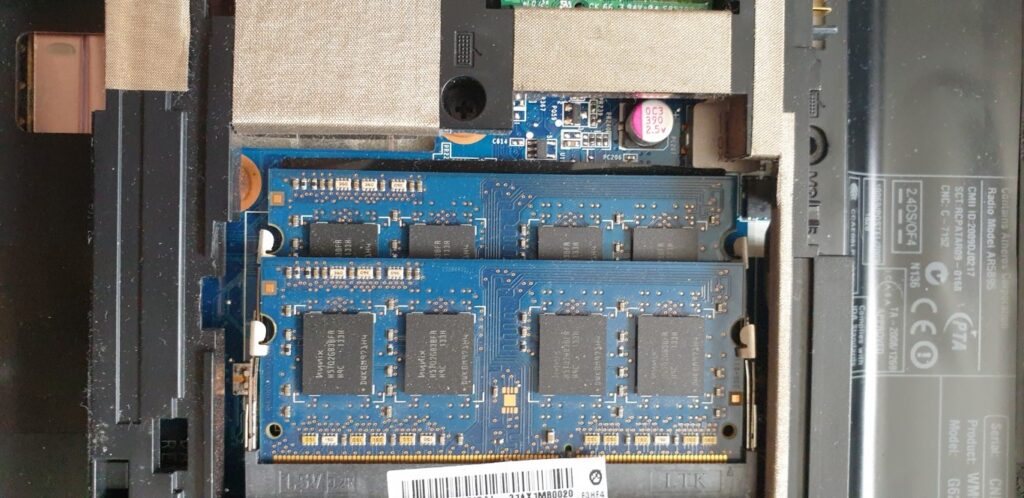
Remove the RAM modules:

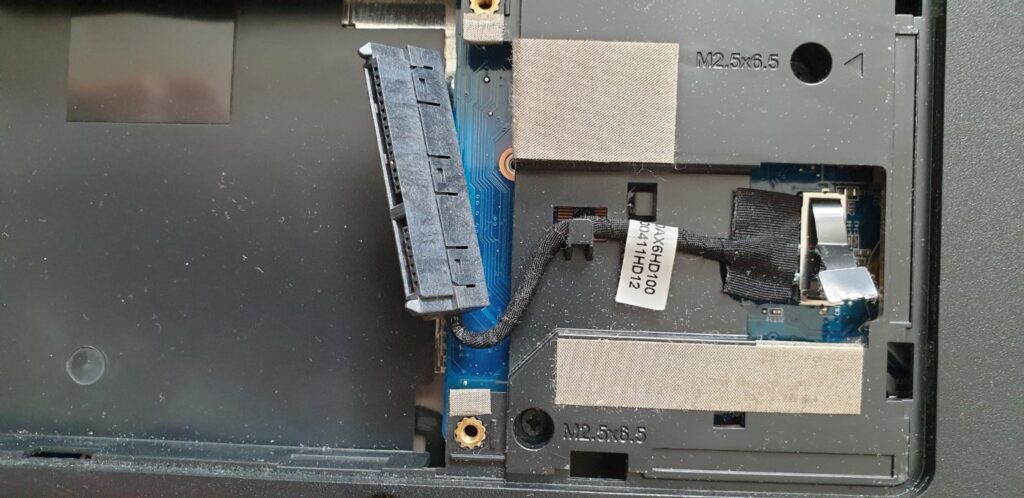
Remove the hard drive:

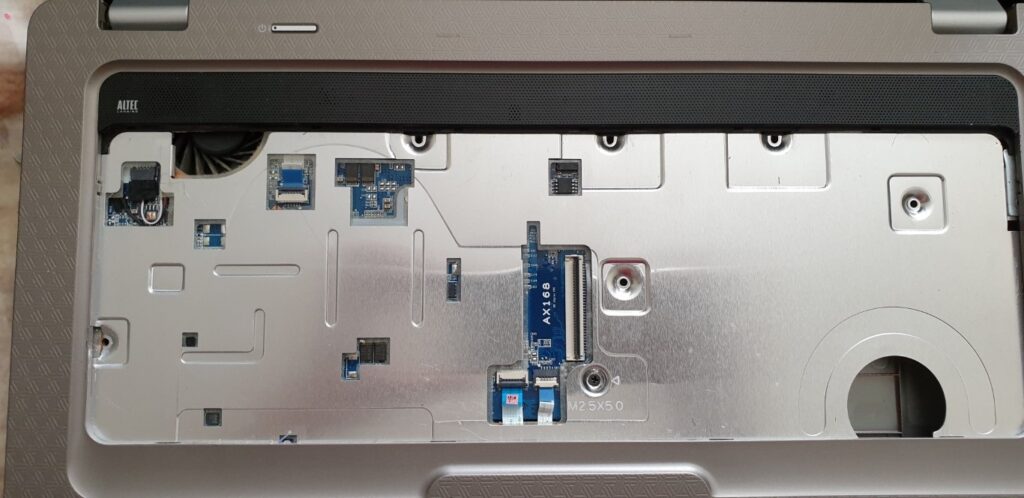
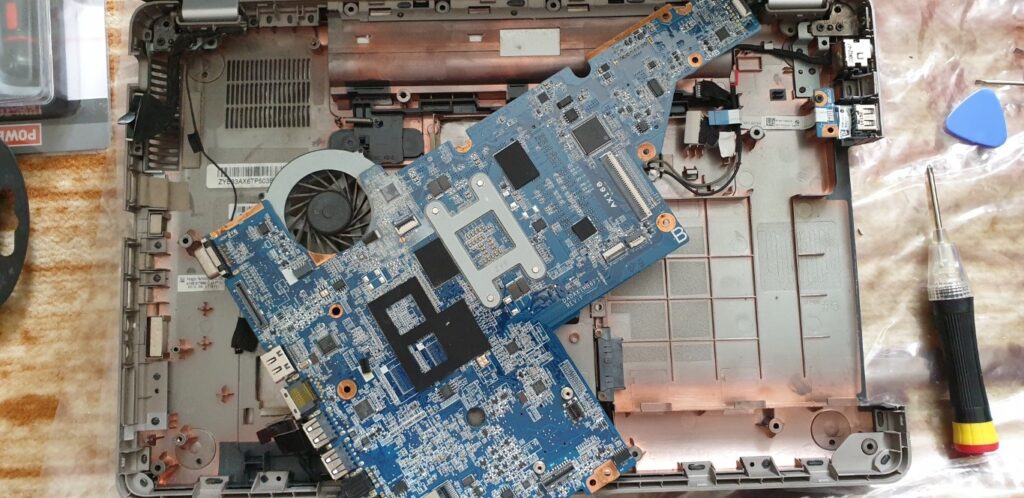
Coming to the front side, removing the keyboard. There are screws underneath the keyboard that hold mother board and the back plate in place. So have to explose the front side and unscrew those screws.

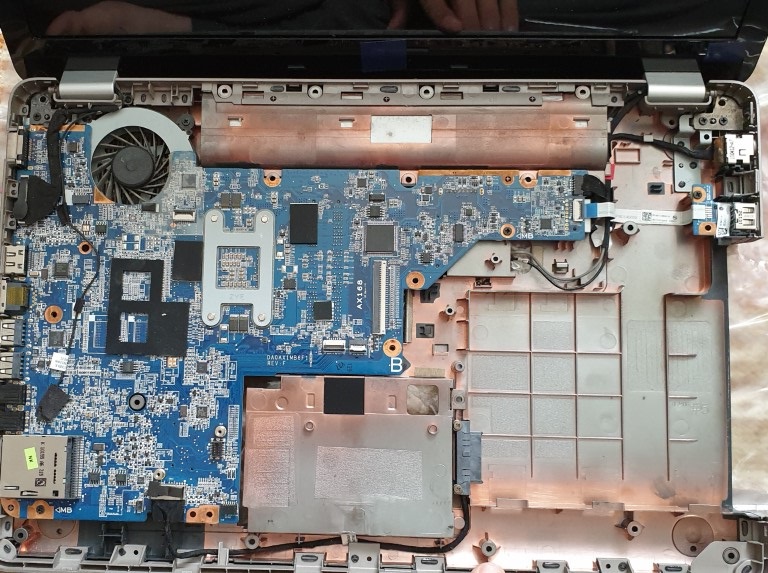
The heatsink is not on the top side of the motherboard so need to go behind:

As you can see, the fan is connected with the heatsink through the copper tubing. The processor is underneath the heatsink.

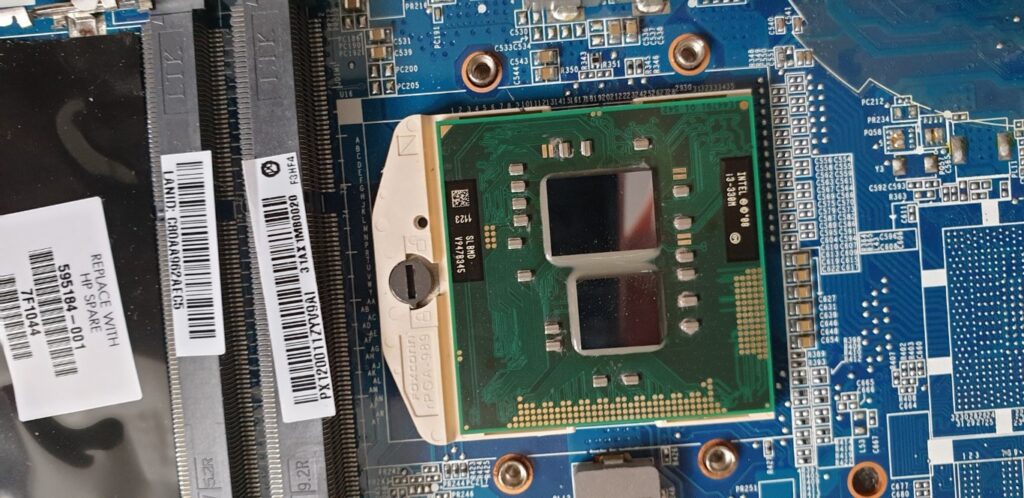
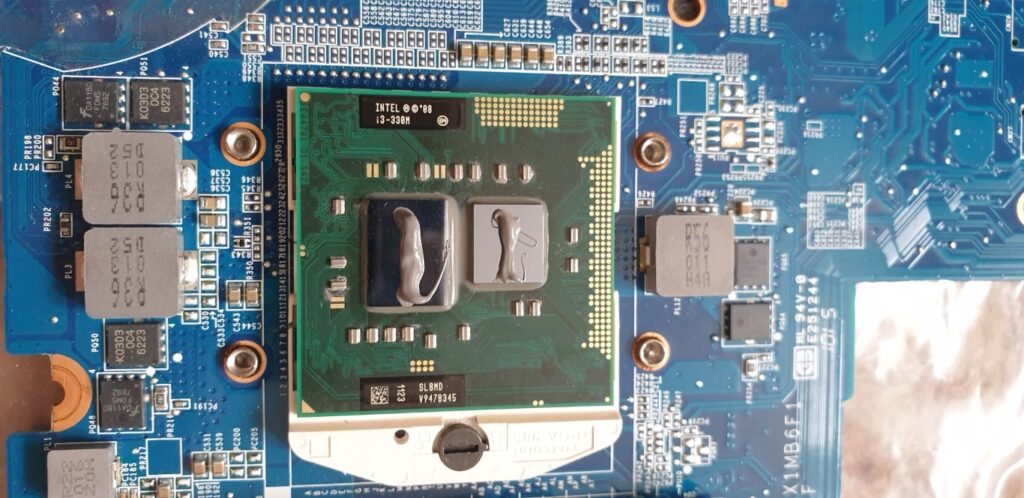
Upon removing the heat-sink, I found out that the heat-sink gel had indeed dried and as a result there was less contact between the two surfaces and hence much less heat conduction.

Cleaned the surface of the processor:

Clean the bottom of the heat-sink:

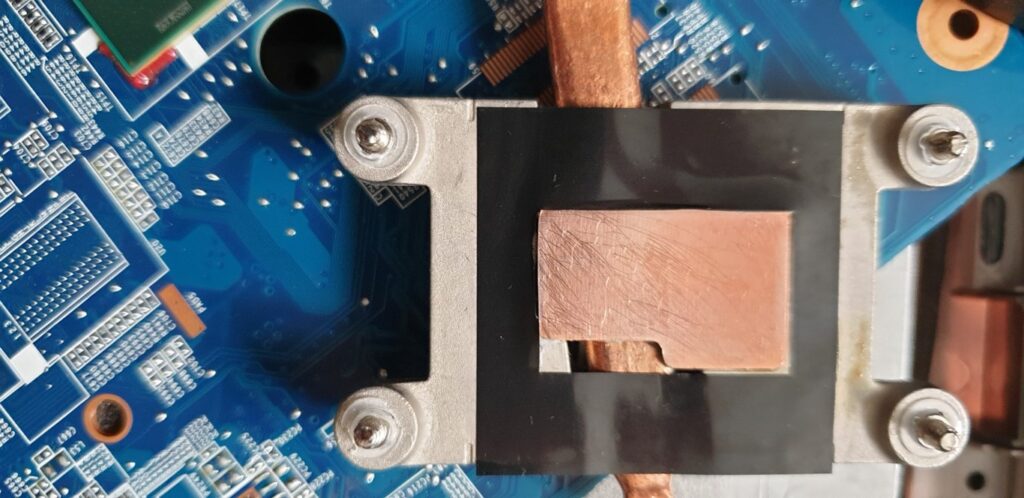
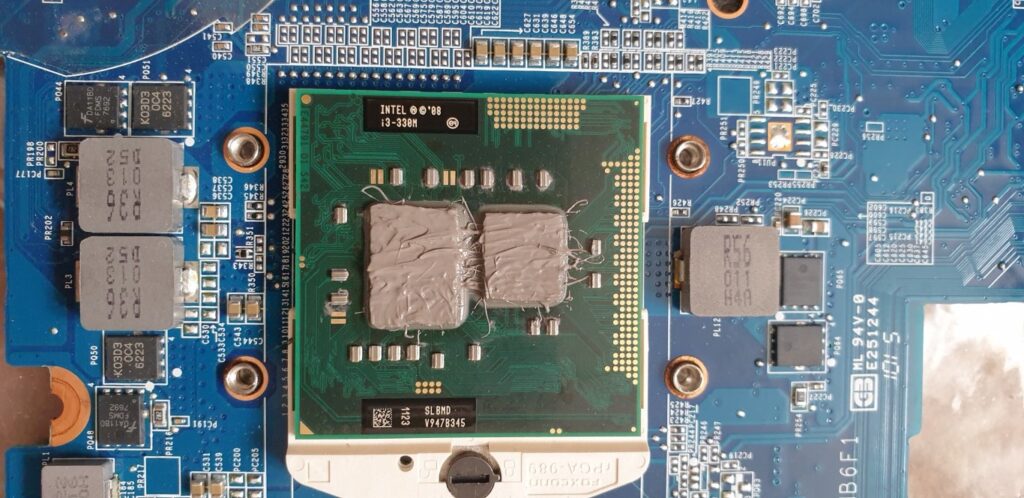
Now, applying new heat-sink compound or gel. There are many articles explaining how to apply the gel such as in a straight line, in a cross etc. I went for the straight line and then spread-it method:

Also, make sure you do not over tighten the heatsink screws, they need to be as tight as it can go. This is because, otherwise, it will sequeeze out the heat-sink gel and the heat conduction will be affected.

After replacing the heat-sink compound, I put back the entire laptop in reverse order and started the laptop. Guess what, it no longer cuts off :).

Probably added another 5-10 years of life in the laptop as I managed to get a free upgrade to the OS from Windows 7 to Windows 10. I also upgarded the RAM and hard drive.

Share Button

Opening BMW Boot/Trunk Without Its Own Battery

Normally, it is advised to disconnect your car battery when one is not going use the car for a longer period. This is to prevent the battery getting drained and the car becoming useless upon your return.

Particularly with the BMWs without a manual lock, the Boot/Trunk comes with an electrical latch which can only be opened with its remote.

This means, once you disconnect the battery and close the Boot/Trunk, there is no direct way to open it when you want to reconnect the battery wire/lead.

I have seen many videos showing drilling hole through the rear seats to reach the latch from the inside of the car. There is no need to go to this extreme because BMW provides a very easy indirect way to open the Boot/Trunk even if car’s own battery is disconnected. Please let me explain with some photographs.

All you require is 12V DC battery, ideally another car battery. This does not have to be a brand new one but atleast which can provide a small amount of current to drive the electrical latch of the Boot/Trunk. Even a portable jump starter should work.

I chose to use an old used 12V car battery which I had to replace with new one because it had become weak and could not start my car’s diesel engine. I think any other 12V DC battery with sufficient current capacity should also be able to open the Boot/Trunk as I think it does not have to be a car battery. The following photo shows the old car battery that I had used.

I hope you know how to open the driver side door manually using the physical key from the key fob. Then open the car bonet. The next thing you have to do is to locate a red capped protuding connector looking thing in your BMW’s engine bay as shown with an arrow in the following photo:

In fact, this connector is a positive terminal of the Car’s power supply. The body is a negative terminal. So, connect these car terminals to the battery terminals as shown in the following photo:

After these terminals are connected, now you can press your remote key fob boot/trunk open button. This should open the electrical latch of the boot and now you can open the boot/trunk as shown in the following photo:

Now, after you have opened the boot, first disconnect this external battery. Then reconnect the car’s own battery. If everything else is ok, then your car should function normally.

Share Button

Cross Compiling OpenCV for Xilinx Zynq Arm on Ubuntu Linux OS

I am writing this to keep a log for myself and others whenever I want to cross compile OpenCV for Xilinx Zynq – ARM platform for Ubuntu 14.04. I have followed instructions mentioned on Xilinx-Wiki however I had to tweak quite a few instructions for me at a few places in order to successfully compile OpenCV. I have chosen to download and compile OpenCV-2.4.9 in particular. I did this a while ago so the Xilinx Vivado tools are older versions Vivado 2014.4. I have not tried on other versions of Ubuntu and OpenCV but I think it should still work. I have not listed any OS level dependencies that is required before attempting to start cross compiling OpenCV for Xilinx Zynq. The prerequisite is that the Xilinx Vivado tools have been installed correctly in Ubuntu /opt/Xilinx/ directory and can be invoked from Linux shell prompt. The following are my compilation of the instructions:

  1. First install Xilinx Vivado Tools successfully without any problems in /opt/Xilinx/Vivado folder.
  2. Create a text file (env_opencv_xilinx) with the following environment variables to be sourced so that the Vivado tools are available on command line:
  3. export CROSS_COMPILE=arm-xilinx-linux-gnueabi-
    source /opt/Xilinx/Vivado/2014.4/settings64.sh
  4. Source env_opencv_xilinx file
  5. Download OpenCV-2.4.9 from http://opencv.org/downloads.html
  6. Unzip and untar OpenCV and place it in /home/user/opencv-2.4.9 folder
  7. Download ffmpeg-2.8.10 from http://www.ffmpeg.org/download.html#releases
  8. Unzip and untar FFmpeg folder. I chose to move the ffmpeg-2.8.10 folder inside the opencv-2.4.9 folder.
  9. Change directory inside the ffmpeg-2.8.10 folder
  10. Run: ./configure –enable-shared –disable-static –cross-prefix=arm-xilinx-linux-gnueabi- –arch=armv7l –target-os=linux –prefix=/home/user/opencv-2.4.9_arm/ffmpeg-2.8.10/
  11. Add the following paths in the env_opencv_xilinx and source it again:
  12. export LD_LIBRARY_PATH=/home/user/opencv-2.4.9_arm/ffmpeg-2.8.10/lib:${LD_LIBRARY_PATH}
    export C_INCLUDE_PATH=/home/user/opencv-2.4.9_arm/ffmpeg-2.8.10/include:${C_INCLUDE_PATH}
    export CPLUS_INCLUDE_PATH=/home/user/opencv-2.4.9_arm/ffmpeg-2.8.10/include:${CPLUS_INCLUDE_PATH}
    export PKG_CONFIG_PATH=/home/user/opencv-2.4.9_arm/ffmpeg-2.8.10/lib/pkgconfig:${PKG_CONFIG_PATH}
  13. Create a folder called build within the opencv-2.4.9 directory.
  14. Add the following lines in a text file called toolchain.make and place it in the /home/user/opencv-2.4.9/ folder:
  15. set( CMAKE_SYSTEM_NAME Linux )
    set( CMAKE_SYSTEM_PROCESSOR arm )
    set( CMAKE_C_COMPILER arm-xilinx-linux-gnueabi-gcc )
    set( CMAKE_CXX_COMPILER arm-xilinx-linux-gnueabi-g++ )
    set( CMAKE_INSTALL_PREFIX /home/user/opencv-2.4.9_arm/build )
    set( CMAKE_FIND_ROOT_PATH /opt/Xilinx/SDK/2014.4/gnu/arm/lin/arm-xilinx-linux-gnueabi )
  16. Copy all the generated SO library files from ffmpeg-2.8.10/lib/ folder to opencv-2.4.9/build/lib folder otherwise OpenCV build process may not find the FFmpeg libraries automatically.
  17. Change directory into the build folder.
  18. I have chosen to set the BUILD_opencv_nonfree=ON as I would like to explore the algorithms available in the non-free of OpenCV.
  19. Run: cmake -D CMAKE_TOOLCHAIN_FILE=toolchain.make -D BUILD_opencv_nonfree=ON /home/user/opencv-2.4.9_arm/
  20. Check the configuration information of OpenCV to confirm the FFmpeg library is detected.
  21. Customise Build options by running: ccmake .
  22. I have chosen to keep WITH_JPEG and WITH_PNG set to ON so that the applications can read and write JPEG and PNG format image files, however Xilinx recommends the following options to be set to OFF
  23. WITH_1394, WITH_CUDA, WITH_CUFFT, WITH_EIGEN, WITH_GSTREAMER, WITH_GTK, WITH_JASPER, WITH_OPENEXR, WITH_PVAPI, WITH_QT, WITH_TBB, WITH_TIFF, WITH_UNICAP, WITH_V4L, WITH_XINE
  24. First press ‘c’ then ‘g’ to generate new Makefile. Alternatively edit CMakeCache.txt to modify build options. Check that WITH_FFMPEG=ON in CMakeCache.txt to enable FFmpeg support.
  25. Run: make
  26. Copy and Save build/lib/libopencv_core.so.2.4.9 in a different folder than lib.
  27. Run: make install .If all goes well then there will not be any errors however I did get an error here saying libopencv_core.so.2.4.9 not found, flagged by the module/core/cmake_install.cmake script. I checked that this particular SO was generated however during the make install process, due to may be some incorrectly generated command in some script it gets removed. I did not have time to debug this in detail however I fond a work around to complete the installation.
  28. Edit build/modules/core/cmake_install.cmake and remove the following lines, this will not generate the error during “make install” and the installation should now complete:
  29. “FILE(INSTALL DESTINATION “${CMAKE_INSTALL_PREFIX}/lib” TYPE SHARED_LIBRARY FILES
    “/home/jj901099/opencv-2.4.9_arm/build/lib/libopencv_core.so.2.4.9”
    “/home/jj901099/opencv-2.4.9_arm/build/lib/libopencv_core.so.2.4”
    “/home/jj901099/opencv-2.4.9_arm/build/lib/libopencv_core.so”
    )”
  30. Copy the saved libopencv_core.2.4.9 back to the build/lib/ folder. That’s it.

If I have not missed any step then Opencv-2.4.9 should have now compiled in the opencv-2.4.9/build directory, enjoy image processing.


Share Button

Problem with Cross Compiling OpenCV for Xilinx Zynq – ARM with FFmpeg on Ubuntu Linux OS

Problem:

I followed the instructions mentioned by Xilinx at http://www.wiki.xilinx.com/OpenCV+Installation in order to cross compile the OpenCV-2.4.9 with FFmpeg for Xilinx Zynq Platform on Ubuntu 14.04.

While configuring the FFmpeg, it gave me the following warning:

“WARNING: arm-xilinx-linux-gnueabi-pkg-config not found, library detection may fail.”

The FFmpeg did compile ok and generated all the necessary SO files however as a result of the warning when I tried to build the OpenCV-2.4.9, I got errors that libavcodec.so.56, libavformat.so.56 etc FFmpeg libraries are not found.

Following errors while build takes place :

/usr/lib/gcc-cross/arm-linux-gnueabi/4.7/../../../../arm-linux-gnueabi/bin/ld: warning: libswresample.so.1, needed by opencv/ffmpeg-2.7.1/lib/libavcodec.so.56, not found (try using -rpath or -rpath-link)
opencv/ffmpeg-2.7.1/lib/libavcodec.so.56: undefined reference to `swr_close@LIBSWRESAMPLE_1′

/opt/Xilinx/SDK/2014.4/gnu/arm/lin/bin/../lib/gcc/arm-xilinx-linux-gnueabi/4.8.3/../../../../arm-xilinx-linux-gnueabi/bin/ld: warning: libswscale.so.3, needed by ../../lib/libopencv_highgui.so.2.4.9, not found (try using -rpath or -rpath-link)
../../lib/libopencv_highgui.so.2.4.9: undefined reference to `avcodec_decode_video2@LIBAVCODEC_56′

Solution:

The way I have manged to resolve this and successfully cross compile OpenCV is by manually copying the SO libs from FFmpeg/lib folder to the OpenCV/build/lib directory and then rerunning the make. After this OpenCV was successfully built.


Share Button