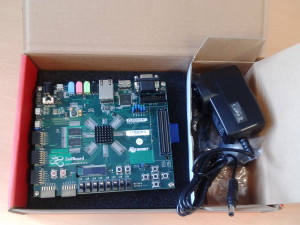
I am writing this to keep a log for myself and others whenever I want to cross compile OpenCV for Xilinx Zynq – ARM platform for Ubuntu 14.04. I have followed instructions mentioned on Xilinx-Wiki however I had to tweak quite a few instructions for me at a few places in order to successfully compile OpenCV. I have chosen to download and compile OpenCV-2.4.9 in particular. I did this a while ago so the Xilinx Vivado tools are older versions Vivado 2014.4. I have not tried on other versions of Ubuntu and OpenCV but I think it should still work. I have not listed any OS level dependencies that is required before attempting to start cross compiling OpenCV for Xilinx Zynq. The prerequisite is that the Xilinx Vivado tools have been installed correctly in Ubuntu /opt/Xilinx/ directory and can be invoked from Linux shell prompt. The following are my compilation of the instructions:
- First install Xilinx Vivado Tools successfully without any problems in /opt/Xilinx/Vivado folder.
- Create a text file (env_opencv_xilinx) with the following environment variables to be sourced so that the Vivado tools are available on command line:
- export CROSS_COMPILE=arm-xilinx-linux-gnueabi-
source /opt/Xilinx/Vivado/2014.4/settings64.sh - Source env_opencv_xilinx file
- Download OpenCV-2.4.9 from http://opencv.org/downloads.html
- Unzip and untar OpenCV and place it in /home/user/opencv-2.4.9 folder
- Download ffmpeg-2.8.10 from http://www.ffmpeg.org/download.html#releases
- Unzip and untar FFmpeg folder. I chose to move the ffmpeg-2.8.10 folder inside the opencv-2.4.9 folder.
- Change directory inside the ffmpeg-2.8.10 folder
- Run: ./configure –enable-shared –disable-static –cross-prefix=arm-xilinx-linux-gnueabi- –arch=armv7l –target-os=linux –prefix=/home/user/opencv-2.4.9_arm/ffmpeg-2.8.10/
- Add the following paths in the env_opencv_xilinx and source it again:
- export LD_LIBRARY_PATH=/home/user/opencv-2.4.9_arm/ffmpeg-2.8.10/lib:${LD_LIBRARY_PATH}
export C_INCLUDE_PATH=/home/user/opencv-2.4.9_arm/ffmpeg-2.8.10/include:${C_INCLUDE_PATH}
export CPLUS_INCLUDE_PATH=/home/user/opencv-2.4.9_arm/ffmpeg-2.8.10/include:${CPLUS_INCLUDE_PATH}
export PKG_CONFIG_PATH=/home/user/opencv-2.4.9_arm/ffmpeg-2.8.10/lib/pkgconfig:${PKG_CONFIG_PATH} - Create a folder called build within the opencv-2.4.9 directory.
- Add the following lines in a text file called toolchain.make and place it in the /home/user/opencv-2.4.9/ folder:
- set( CMAKE_SYSTEM_NAME Linux )
set( CMAKE_SYSTEM_PROCESSOR arm )
set( CMAKE_C_COMPILER arm-xilinx-linux-gnueabi-gcc )
set( CMAKE_CXX_COMPILER arm-xilinx-linux-gnueabi-g++ )
set( CMAKE_INSTALL_PREFIX /home/user/opencv-2.4.9_arm/build )
set( CMAKE_FIND_ROOT_PATH /opt/Xilinx/SDK/2014.4/gnu/arm/lin/arm-xilinx-linux-gnueabi ) - Copy all the generated SO library files from ffmpeg-2.8.10/lib/ folder to opencv-2.4.9/build/lib folder otherwise OpenCV build process may not find the FFmpeg libraries automatically.
- Change directory into the build folder.
- I have chosen to set the BUILD_opencv_nonfree=ON as I would like to explore the algorithms available in the non-free of OpenCV.
- Run: cmake -D CMAKE_TOOLCHAIN_FILE=toolchain.make -D BUILD_opencv_nonfree=ON /home/user/opencv-2.4.9_arm/
- Check the configuration information of OpenCV to confirm the FFmpeg library is detected.
- Customise Build options by running: ccmake .
- I have chosen to keep WITH_JPEG and WITH_PNG set to ON so that the applications can read and write JPEG and PNG format image files, however Xilinx recommends the following options to be set to OFF
- WITH_1394, WITH_CUDA, WITH_CUFFT, WITH_EIGEN, WITH_GSTREAMER, WITH_GTK, WITH_JASPER, WITH_OPENEXR, WITH_PVAPI, WITH_QT, WITH_TBB, WITH_TIFF, WITH_UNICAP, WITH_V4L, WITH_XINE
- First press ‘c’ then ‘g’ to generate new Makefile. Alternatively edit CMakeCache.txt to modify build options. Check that WITH_FFMPEG=ON in CMakeCache.txt to enable FFmpeg support.
- Run: make
- Copy and Save build/lib/libopencv_core.so.2.4.9 in a different folder than lib.
- Run: make install .If all goes well then there will not be any errors however I did get an error here saying libopencv_core.so.2.4.9 not found, flagged by the module/core/cmake_install.cmake script. I checked that this particular SO was generated however during the make install process, due to may be some incorrectly generated command in some script it gets removed. I did not have time to debug this in detail however I fond a work around to complete the installation.
- Edit build/modules/core/cmake_install.cmake and remove the following lines, this will not generate the error during “make install” and the installation should now complete:
- “FILE(INSTALL DESTINATION “${CMAKE_INSTALL_PREFIX}/lib” TYPE SHARED_LIBRARY FILES
“/home/jj901099/opencv-2.4.9_arm/build/lib/libopencv_core.so.2.4.9”
“/home/jj901099/opencv-2.4.9_arm/build/lib/libopencv_core.so.2.4”
“/home/jj901099/opencv-2.4.9_arm/build/lib/libopencv_core.so”
)” - Copy the saved libopencv_core.2.4.9 back to the build/lib/ folder. That’s it.
If I have not missed any step then Opencv-2.4.9 should have now compiled in the opencv-2.4.9/build directory, enjoy image processing.


